 What features are there in the Home menu?
The Home menu is the control panel of the Jazzit financial statements. The following article will describe the features of the Home menu.
It is recommended that Home Menu selections are completed first when working on a file. Selections in the Home menu determine the default settings in the Jazzit letters. For example setting the Home menu for Review engagements will set the engagement letter to Review as well.
Navigating to the Home menu
The Home menu is located at the top of the Jazzit financial statements. You can always access the Home menu from anywhere in the Jazzit financial statements using the freeze frame pinned below CaseView’s ribbon.
Press the  to access the Home menu.
Layout of the Home menu
The Home menu is composed of several subcategories. They are shown in the screenshot below from left to right. Click on the category title to access its functions.

Diagnostics
The Diagnostics section of the Home menu offers shortcuts to various CaseWare functions. These functions are useful in diagnosing issues with the Jazzit financial statements. It contains shortcuts to a number of commonly used CaseWare functions.

- Accounts missing Map numbers – Opens a browse window showing all unmapped accounts. This allows the preparer to verify that all accounts have been mapped.
- Accounts with GIFI inconsistencies – The 4 digits in a Jazzit map number (ex: 100.1000) match its corresponding GIFI code in the working trial balance. It is possible to change the GIFI code of an account to be different from the map number. This button opens a browse window showing accounts with trial balance GIFI codes different from their map number. Using this function will help the preparer ensure that the GIFI allocations in the tax return are consistent with the Jazzit mapping.
- Trial Balance – Shortcut to the CaseWare working trial balance.
- Map Numbers – Shortcut to the CaseWare map structure. (Engagement | Mapping)
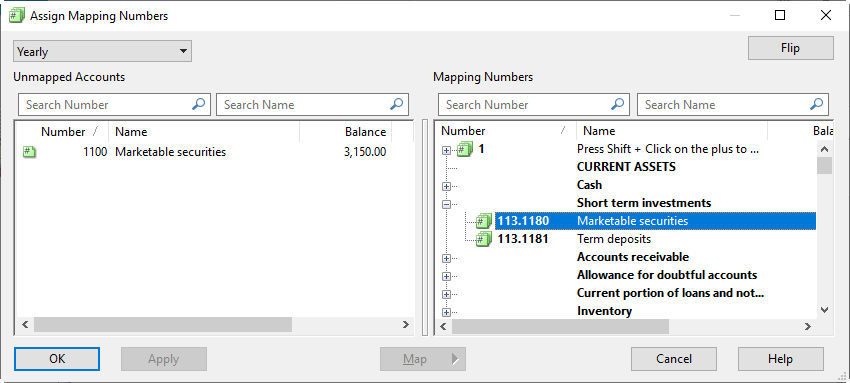
- Assign Mapping Numbers – Shortcut to the Assign Mapping Numbers dialog box. (Engagement | Assign Mapping).
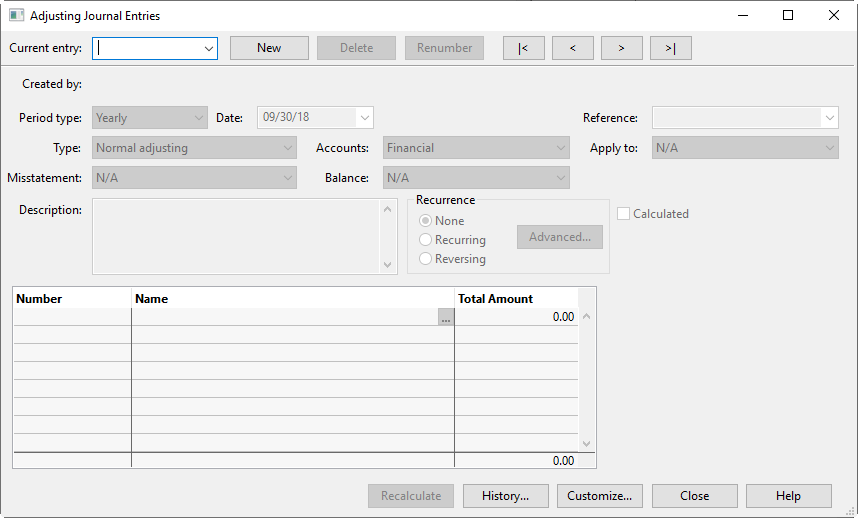
- Adjusting Entries – Shortcut to the CaseWare Adjusting Entries dialog box.
- Open Document – Allows you to directly open any document in the CaseWare document manager. This is useful for quickly jumping to supporting working papers and letters (particularly when you are away using a laptop with one screen).
Display
The Display section holds a number of display/printing related options for the Jazzit financial statements including draft stamp settings.
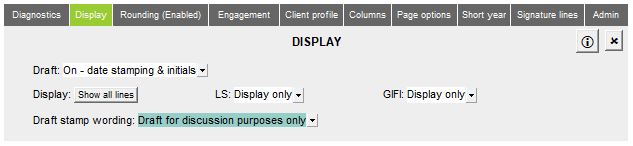
- Draft – There are 3 different watermark options. The watermark will show up when printing the Jazzit financial statements. Select ‘Off – final print’ to turn off the watermark.
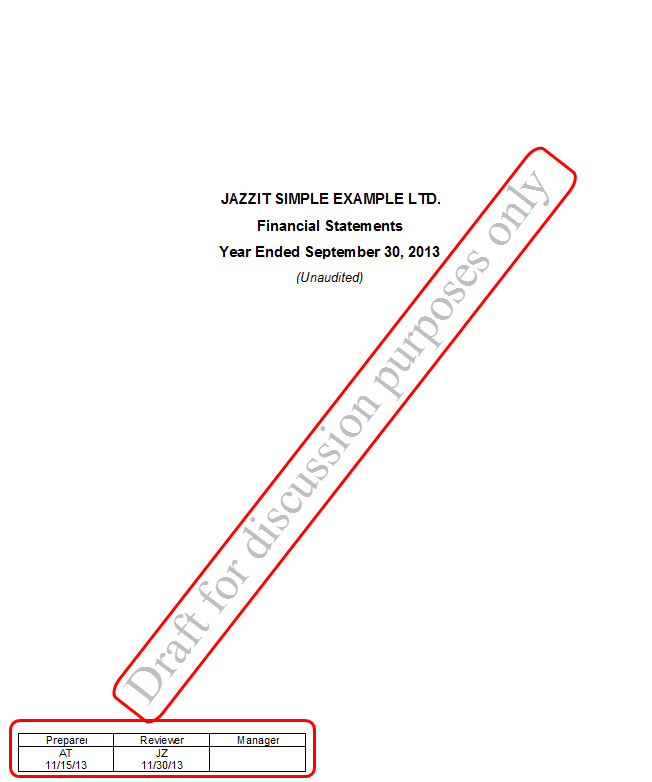
 If you are using electronic signatures as provided by Jazzit, the draft stamp must be set to ‘Off’ in order to activate the signatures.
 - Display – Allows the preparer to toggle between ‘Show all lines’ and ‘Show printing lines only’. ‘Show printing lines only’ makes it easier to review the Jazzit financial statements by hiding lines that are not supposed to print (i.e. nil lines).
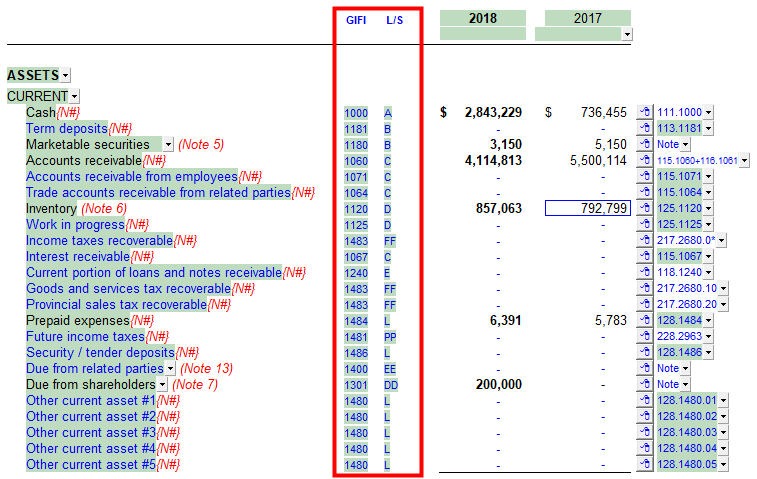
When setting the Jazzit financial statements to ‘Show printing lines only’ this will remove the ability to add additional lines via the express button. If you no longer have the ability to add additional lines, ensure that your FS is set to ‘Show all lines’ - L/S – Allows you to select between 3 options for displaying/printing the L/S numbers on the statements. This option only applies to the 2 column Jazzit financial statements (not 9 column).
- GIFI – Allows you to select between 3 options for displaying/printing the GIFI numbers on the statements. This option only applies to the 2 column Jazzit financial statements (not 9 column).
- Draft stamp wording – Allows you to select custom wording for the draft stamp. The draft stamp is part of the FS watermark (see above).
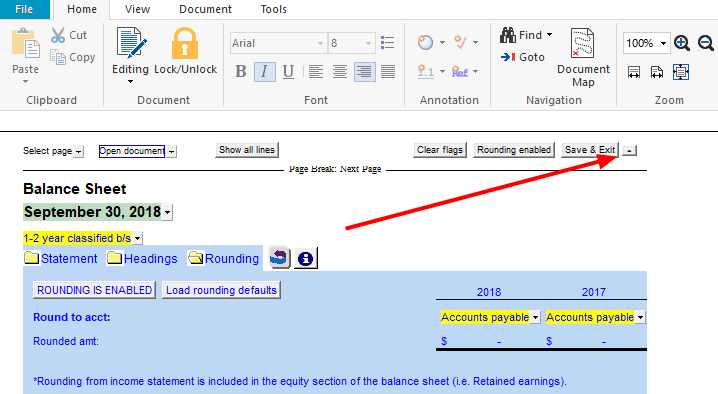
Rounding
The Rounding section enables/disables the rounding function of the Jazzit financial statements and displays a summary of the rounding differences.
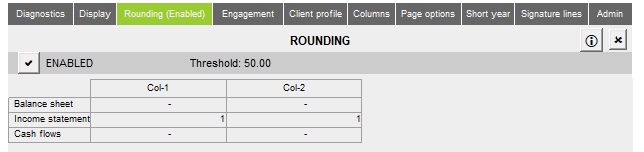
We recommend that rounding is left disabled until the statements are complete and the rounding differences are within the acceptable threshold. If subsequent changes are made to the file, disable the rounding and re-enable to recalculate the rounding differences. The rounding threshold can be set in the Firm Profile module (RD) of the KLIB by your Jazzit administrator.
Depending on whether there are issues affecting the rounding, the rounding status may change to ‘Recalculate Rounding’. If this happens, disable the rounding, resolve the rounding issue(s) then re-enable rounding.
Engagement
This section covers engagement related settings. These settings are particularly important for the engagement report and letters.

- Type – Allows you to set the type of engagement (NTR, Review or Audit). The FS headings and engagement report will change based on the selection. Letter templates (i.e. engagement letter) will automatically adjust their settings based on the selection.
- Wording – Select ‘Plural’ or ‘Singular’ wording for the engagement report (I / We, My / Our etc.). Letter templates (i.e. engagement letter) will automatically adjust their settings based on the selection.
- Designation – Controls the designation displayed in signature area of the engagement report. This will also affect the wording of letters such as the engagement letter. The default can be set in the Firm Profile (RD) located in the Resource Centre (KLIB).
- Default letter signature – This controls the default partner signature for the letters in the CaseWare file. A different partner can still be chosen in the individual letters if necessary. Partners in the dropdown come from the Firm Profile in the Resource Centre.
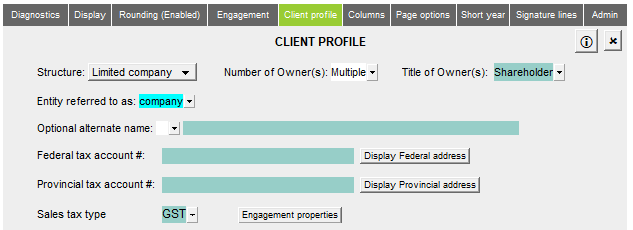
Client Profile
This section covers client related information, including structure and ownership. It also controls how the client’s name is displayed in the letters and financial statements.
- Structure – Choose the structure of your client’s organization. This primarily affects the type of ‘equity’ statements that will be used in the financial statements. It will alter some terminology in the financial statements. The example below shows how the Retained earnings statement is affected by the setting.
- Limited company = Statement of retained earnings
- Not for Profit = Statement of net assets
- Partnership or Proprietorship = Statement of partner’s/proprietor’s capital
- PSAB = You need to switch your FS to 9 columns in order to use this mode. This will alter the Balance sheet into a Statement of Financial Position with a non-financial assets section. A Statement of Operations, Statement of Accumulate Surplus and Statement of Changes in Net Financial Assets will also appear.
- Title of Owners(s) – Changes the title for the ‘owners’ of the organization. It will affect the wording on the balance sheet (i.e. Due to shareholders or Due to members etc).
- Number of owner(s) = Select whether there is a single owner or multiple owners. This will affect the wording in the balance sheet (i.e. Due to shareholder vs. Due to shareholders etc).
- Entity referred to as: - This affects how the entity is referred to as throughout the Jazzit financial statements and letter templates. If the option you are looking for is not available in the dropdown, it can be typed in manually.
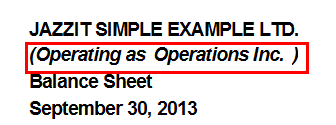
- Operational alternate name – This provides an option to append an “Operating As...” name in addition to the client’s ‘normal’ name. The ‘Operating as...’ can be replaced with a custom phrase.
- Display federal address – This will reveal the default address for the Federal income tax filing office. This information is used in the client enclosure letter, CRA enclosure letter, and provincial tax enclosure letter. Click ‘Update to default’ to automatically fill in this area with information from the Resource Centre’s Firm Profile.
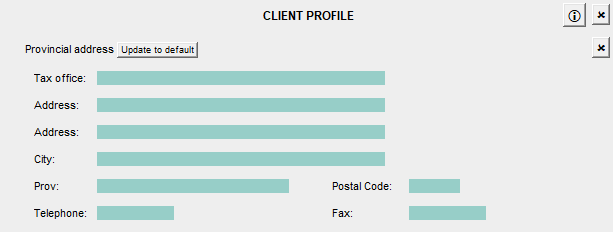
- Display Provincial address - This will reveal the default address for the Provincial income tax filing office. This information is used in the client enclosure letter, CRA enclosure letter, and provincial tax enclosure letter. Click ‘Update to default’ to automatically fill in this area with information from the Resource Centre’s Firm Profile.
- Sales tax type – Normally the sales tax type is determined by the engagement properties. Using this setting will override the sales tax default setting.
Columns
Depending on whether your Jazzit financial statement is set to 9 columns or 2 columns, you will be presented with different column setting interfaces. The following will primarily cover the 2 column interface. For more information on using the 9 column, column settings please see our YouTube video.
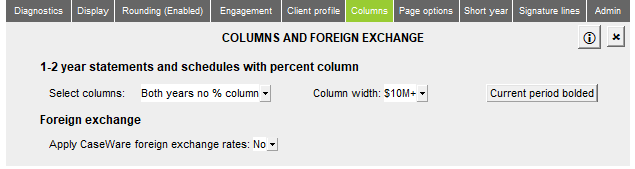
- Select Columns – There are four configurations available. The 2 column financial statements can display both columns (current and prior year) or only the current column. In addition the statements can display a % column or no % column. There will be a percentage column for both the current and prior year columns if both years are chosen.
- Column width – Select the width to accommodate the largest balance displayed in the financial statements. This is also useful for pulling the currency sign closer to the left of the figures if smaller amounts are shown in the financial statements.
- Current period bolding – Controls whether the current period numeric column is bolded or unbolded.
- Apply CaseWare foreign exchange rates – Selecting ‘Yes’ will allow you to apply the foreign exchange rates that are found under ‘foreign exchange’ tab in the CaseWare working trial balance.
- Include reference to foreign currency in page headings – When the above option is enabled you will also be presented with the option of having the financial statements make specific reference to the foreign currency in the page headings.
- Wording for foreign exchange heading – Allows you to specify the wording of the foreign currency reference.
Page Options
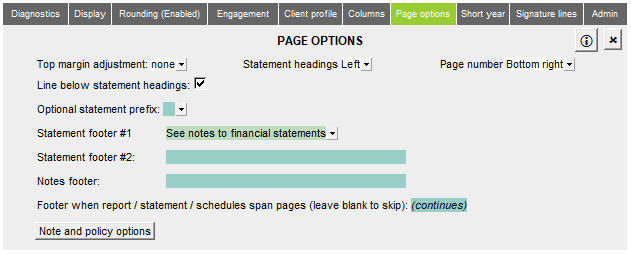
- Top margin adjustment – Enables the adjustment of the top margin by increments of 0.1 inches. Please note that this affects all pages in the financial statements. You can modify the spacing in a particular page by setting the option directly in the appropriate page header.
- Statement headings – Choose the position headings (left, right or centre). Note: this does not affect the alignment in the title page, it must be set independently.
- Page number – Set the position of the page number along the bottom of the page or disable the page number altogether. Note: the position of the page number may be fixed if your statement footers have been customized by Jazzit.
- Line below statement headings – Toggle on/off the bold line located below the statement headings.
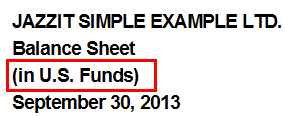
- Optional statement prefix – This attaches a prefix to in the headers of the financial statement. Example: “Consolidated financial statements’. Please note that the prefixes in the schedule headings can be set independently of this setting.
- Statement footers – Enter or select the text you wish to appear in the financial statement footer. Note: A firm specific customisation done by Jazzit may override this.
- Financial statement carry forward header/footer - When a report/statement/schedule spans more than one page by default a (Continues) will appear at the end of the page. This can be changed to an alternative word or string of words, using this field..
Short year

- Current heading – Select the heading wording appropriate for the period being reported. The default setting is ‘year’, it needs to be changed if a short year or interim period is being reported.
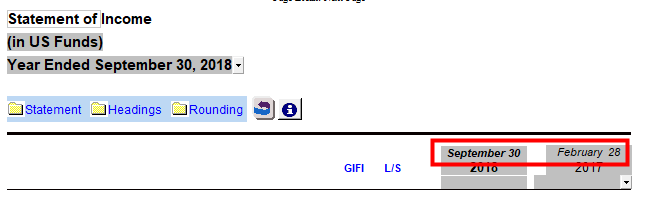
- Current column & Prior column – Select the period to be displayed above the current and prior columns.
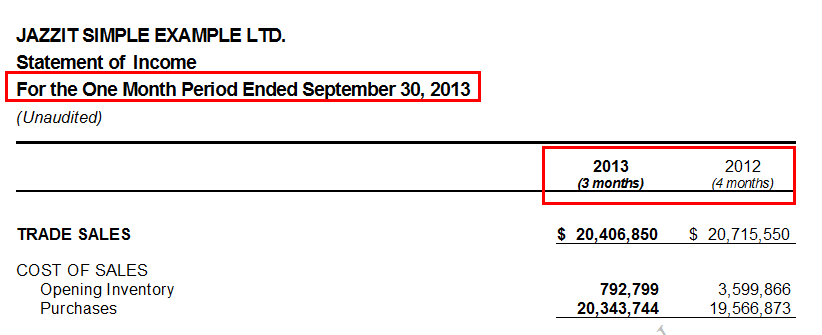
- Comparative date – The comparative date is also used as a column heading for the prior year on each statement. This does not need to be changed if you are preparing a 12 months statement.
Signature lines
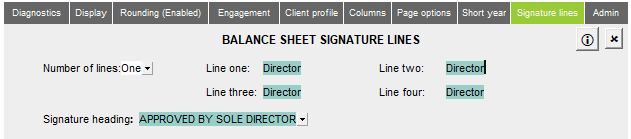
- Number of lines – Select between 1-4 lines to appear on the balance sheet of the Jazzit financial statements.
- Signature heading – Use the dropdown to select the type of heading to appear before the signature lines. You can also manually type in a custom heading.
- Line one to four – Type the appropriate title to appear under each signature line. The default is determined by the organization structure as selected in the Client profile area.

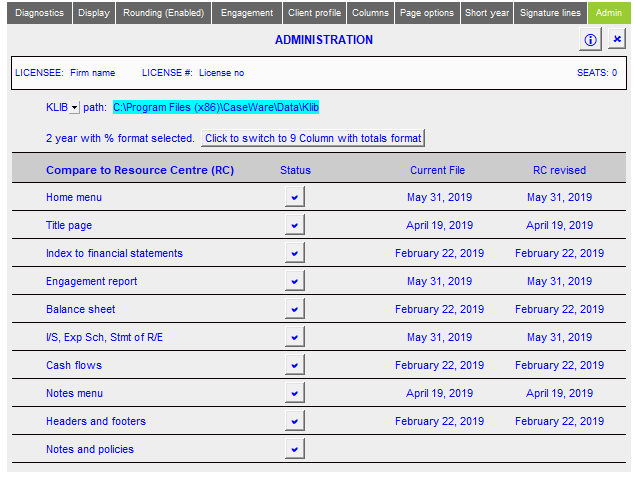
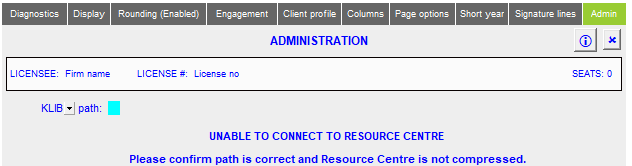
Admin
The Admin panel covers functionality related to the Resource Centre. Ensure that your financial statements are connected to the Resource Centre. If not, the admin panel will display an ‘UNABLE TO CONNECT TO RESOURCE CENTRE’ message. Click on ‘Change Resource Centre location’ and select the folder entitled ‘KLIB’ to correct this.
When connected, the dates of the individual statement components are compared with corresponding dates in the Resource Centre. The status column indicates when an update is available based on those dates. We recommend updating after the CaseWare file has been rolled forward but before work on the current period begins. Click ‘Reload from Resource Centre’ to update.